In this tutorial I will explain how to make sure that the DNS resolution with Windows Server is done according to the IP address of the client.
There are two solutions that we will see in this article.
The first solution to enable network mask sorting is available from Windows 2003 Server. The option is normally enabled by default.
The second solution has been implemented with Windows Server 2016 which is geolocation resolution.
DNS resolution by sorting network masks
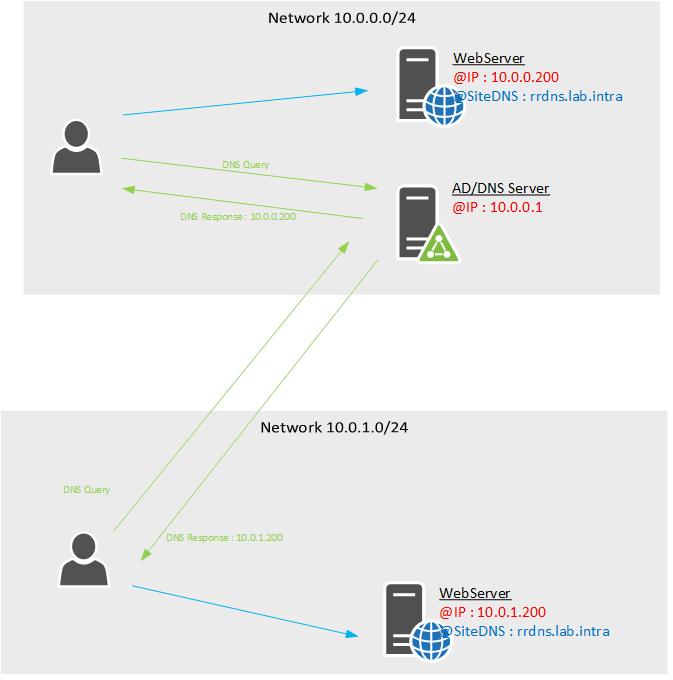
The goal will be to have users access the rddns.lab.intra site in their IP segment as shown in the illustration below.
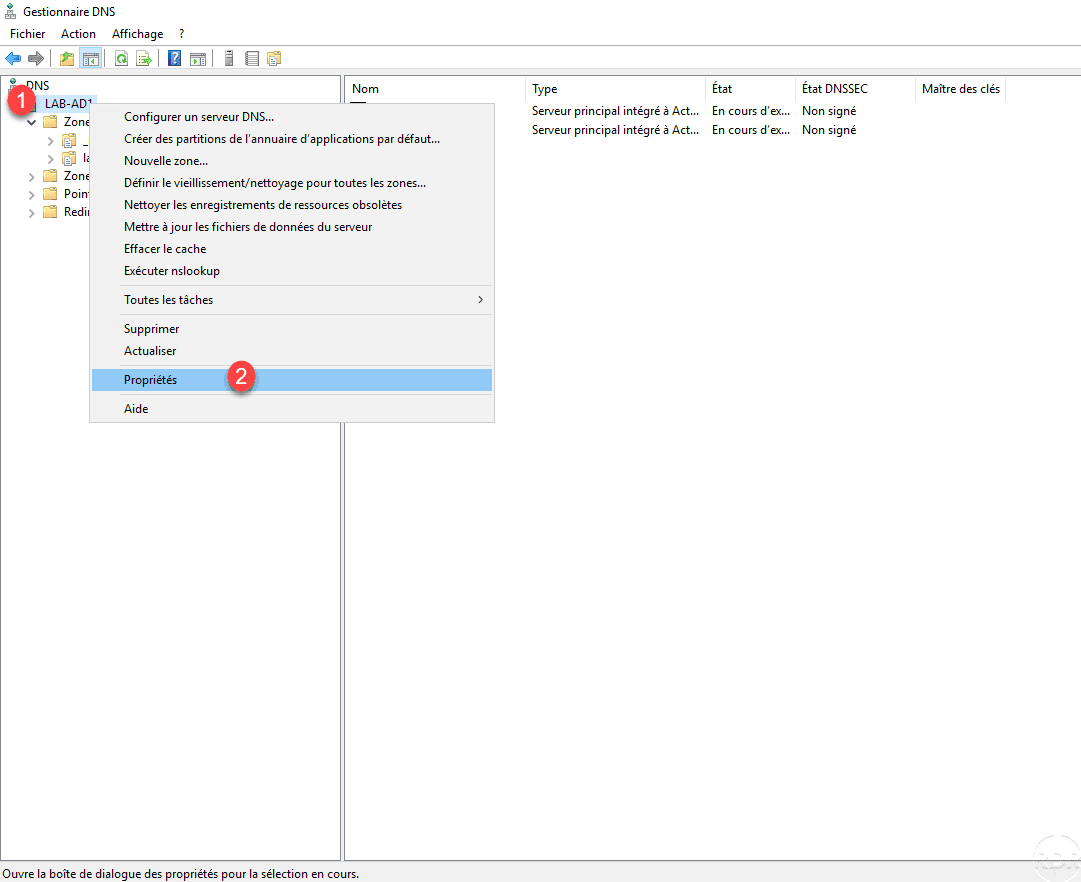
From the DNS Manager console, right-click on server 1 then click Properties 2 .
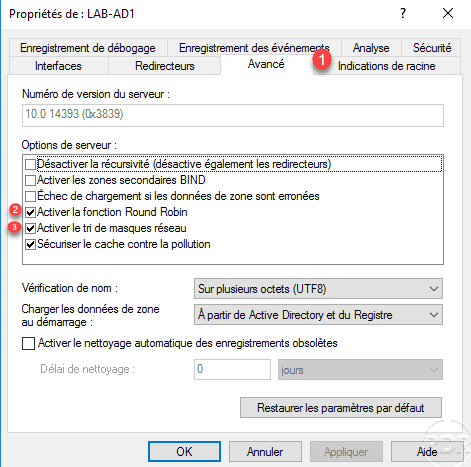
Go to Advanced tab 1 and check that the Enable Round Robin 2 and Enable network mask sort 3 checkboxes are checked. Otherwise, check them and apply the changes.
Create the A records pointing to each server.
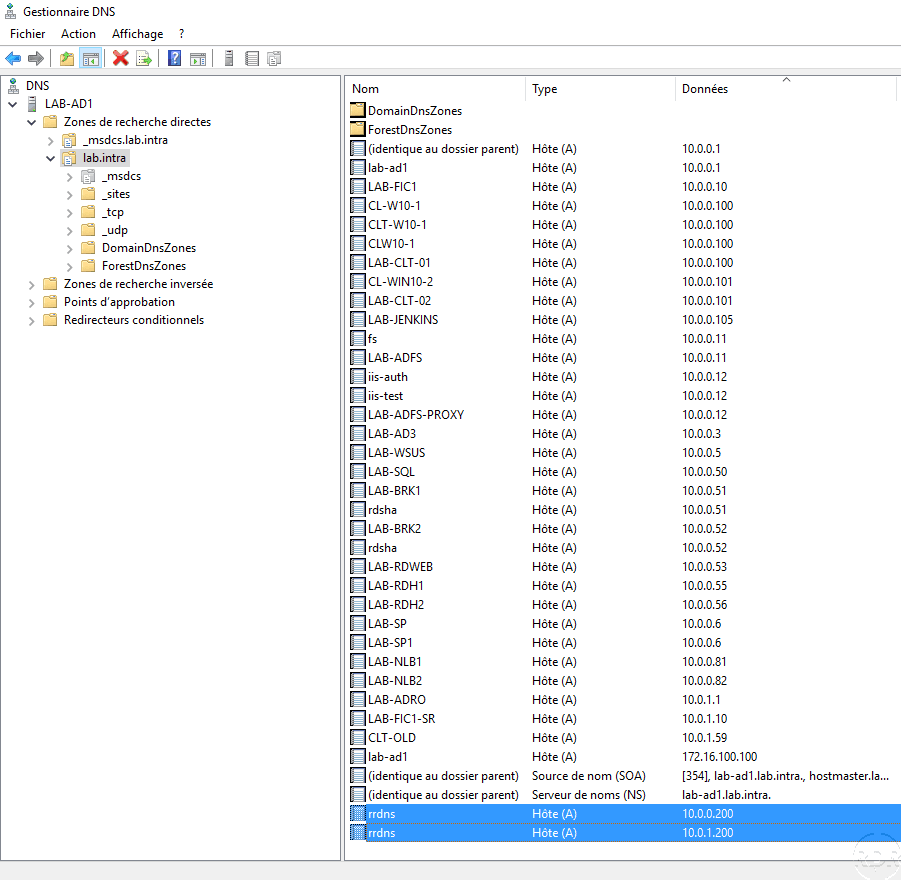
Test the name resolution with clients in each of the networks. On the catches below, we can see that the answer corresponds to the customer network.
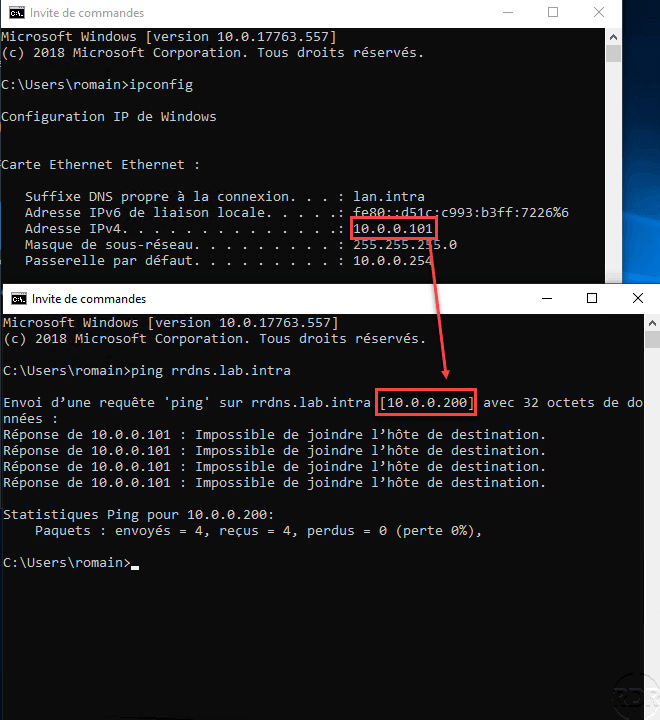
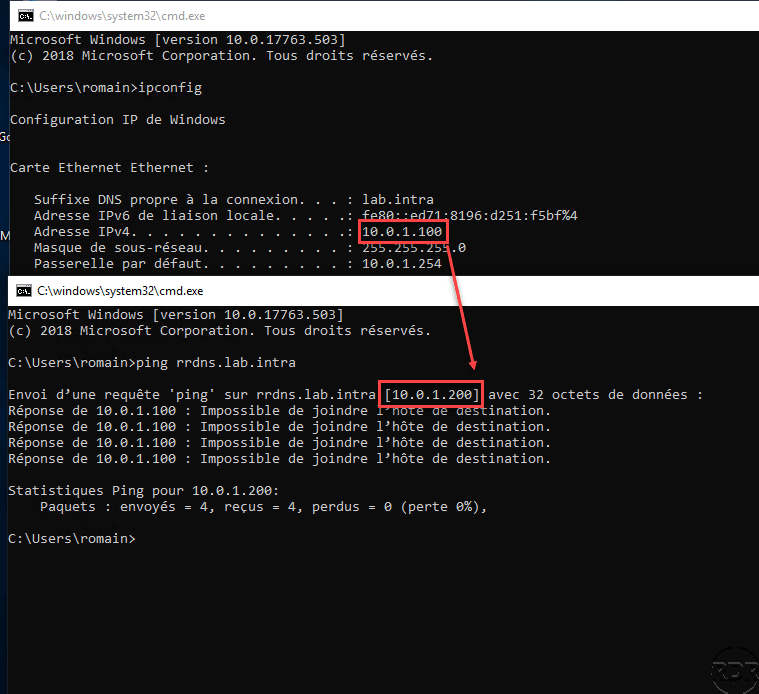
If the IP address does not match any of the networks, Round Robin will be used.
DNS resolution by geolocation
Geolocation-based resolution requires at least Windows Server 2016 and like PowerShell, there is no GUI for configuration.
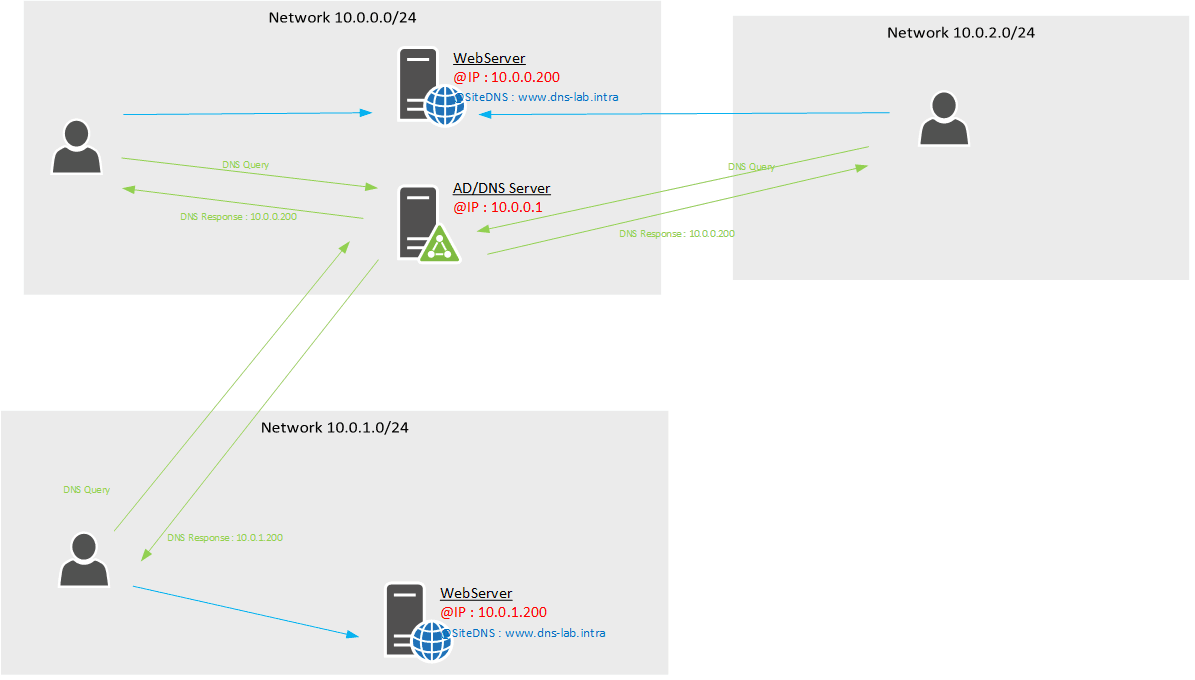
The advantage of using Geolocation is to be able to respond to undeclared DNS registration networks. If we take the previous example and add a third network 10.0.2.0/24, it is possible to define which record should be returned.
In order to avoid touching the Active Directory zone, I created a new dns-lab.intra DNS zone. Below the objective:
All the commands are to be executed in a PowerShell window.
Creating subnets
Add-DnsServerClientSubnet -Name "SiteA" -IPv4Subnet "10.0.0.0/24"
Add-DnsServerClientSubnet -Name "SiteB" -IPv4Subnet "10.0.1.0/24"
Add-DnsServerClientSubnet -Name "SiteC" -IPv4Subnet "10.0.2.0/24"
Creating zone extents
A zone scope is a single instance in the DNS zone that contains its own records.
In our example, you need to create two scopes that correspond to the network where a web server is installed.
Add-DnsServerZoneScope -ZoneName "dns-lab.intra" -Name "SiteAZone"
Add-DnsServerZoneScope -ZoneName "dns-lab.intra" -Name "SiteBZone"
Creating DNS records
We now have to add to thezone extents the DNS record www.
Add-DnsServerResourceRecord -ZoneName "dns-lab.intra" -A -Name "www" -IPv4Address "10.0.0.200" -ZoneScope "SiteAZone"
Add-DnsServerResourceRecord -ZoneName "dns-lab.intra" -A -Name "www" -IPv4Address "10.0.1.200" -ZoneScope "SiteBZone"
Creating policies
The strategies used to link the network to an extent.
So you have to create 3 policies.
Add-DnsServerQueryResolutionPolicy -Name "SiteAPolicy" -Action ALLOW -ClientSubnet "eq,SiteA" -ZoneScope "SiteAZone,1" -ZoneName "dns-lab.intra"
Add-DnsServerQueryResolutionPolicy -Name "SiteCPolicy" -Action ALLOW -ClientSubnet "eq,SiteC" -ZoneScope "SiteAZone,1" -ZoneName "dns-lab.intra"
Add-DnsServerQueryResolutionPolicy -Name "SiteBPolicy" -Action ALLOW -ClientSubnet "eq,SiteB" -ZoneScope "SiteBZone,1" -ZoneName "dns-lab.intra"
The DNS server can now respond to the client based on their network.
To go forward
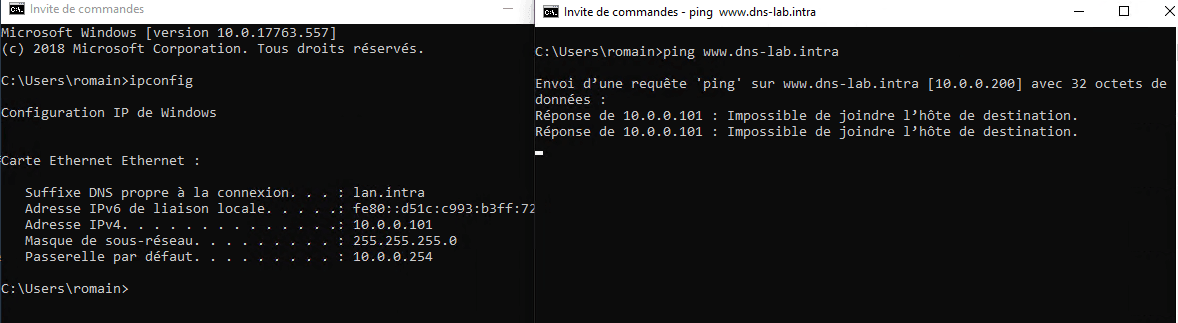
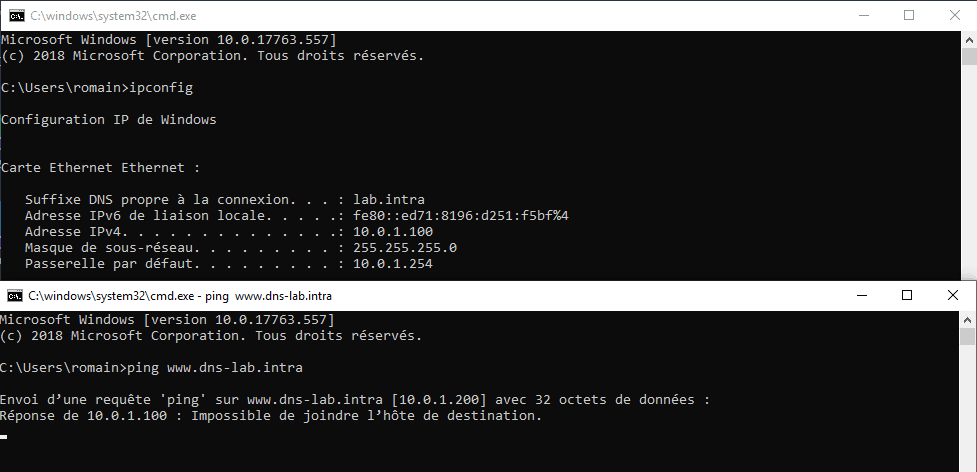
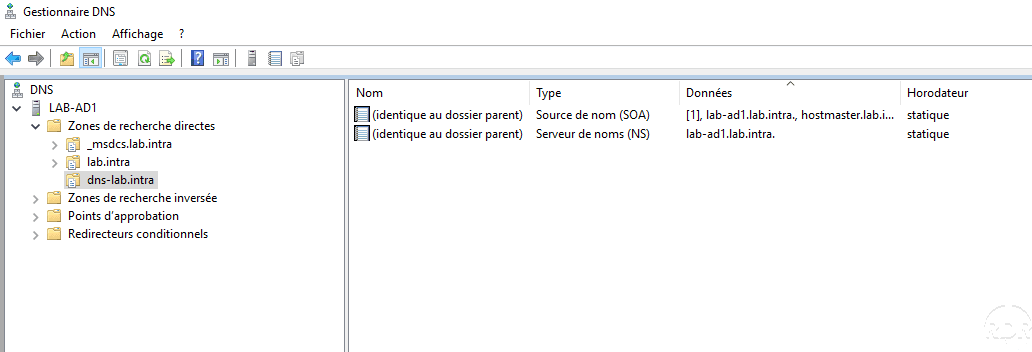
If we look at the zone on the DNS server no record is visible in the console.
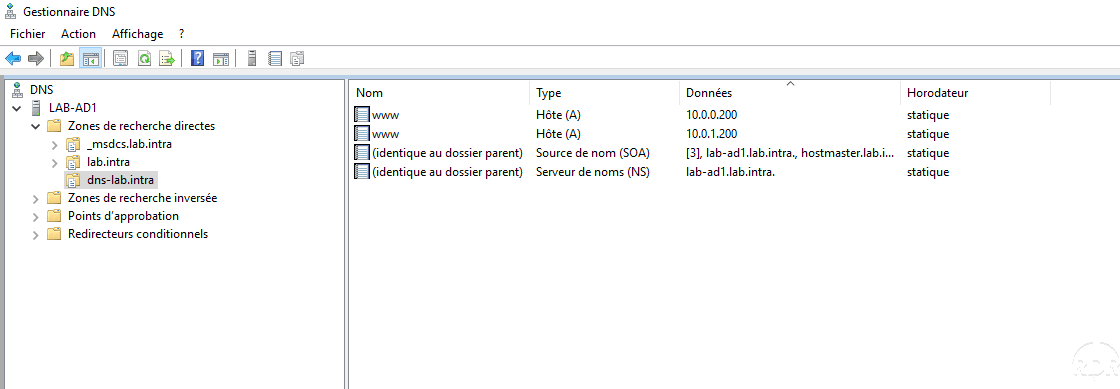
If you want the server to respond to unknown networks add the DNS records normally or powershell.
Add-DnsServerResourceRecord -ZoneName "dns-lab.intra" -A -Name "www" -IPv4Address "10.0.0.200"
Add-DnsServerResourceRecord -ZoneName "dns-lab.intra" -A -Name "www" -IPv4Address "10.0.1.200"
This time the DNS records are visible in the box.
List of cmdlets available : https://docs.microsoft.com/en-us/powershell/module/dnsserver/?view=win10-ps